Fabricating
Parts
In
order to keep
the costs of building the CNC router down I decided that I would do my
own parts fabrication where I could. Once I knew that I could cut
aluminum with my crosscut saw, I bought pieces of 80/20 aluminum on
eBay. Those pieces had to be cut, drilled and tapped before I could
assemble them into a router.
The Cutting
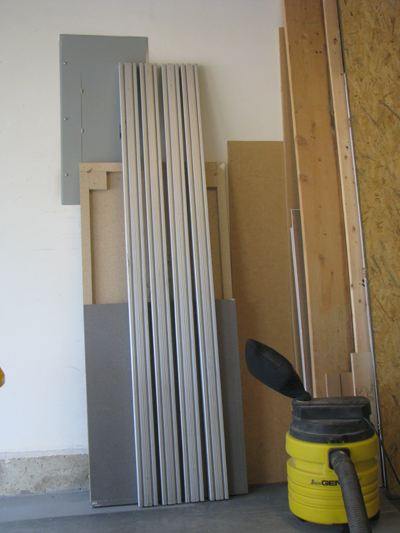
The raw stock, 4 pieces 80/20-1530 - approx 74" long
(not shown, 1 piece of 80/20-3030) |
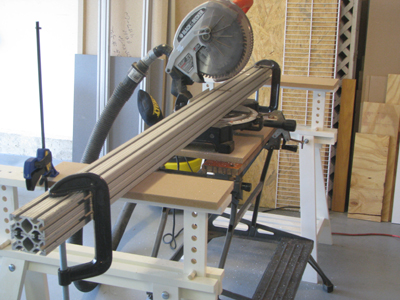
Cutting the side rails. 2 pieces bolted together and
supported on both ends.
That's
a Black & Decker 10" cutoff (miter) saw. I got it 6 years ago when
I finished my basement. I'm using a Black & Decker Piranha 60
tooth carbide blade. I got it when I got the saw and had never used it,
so it was relatively new. Any fine tooth carbide balde ought to work
just fine. Make sure your saw is cutting square in both directions.
Test it on some wood scrap before you ruin expensive 80/20. |
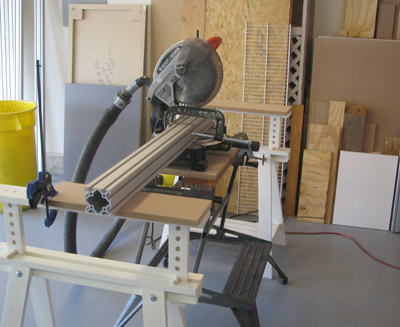 |
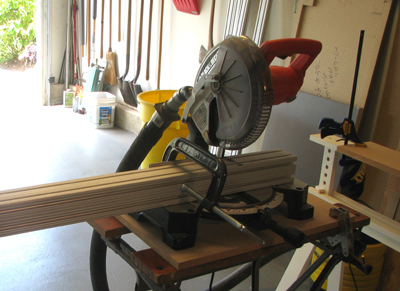
Cutting the 3030 piece to length. |
 |
The end of a days work. All of the pieces of
Stock have been cut to length.
The black marks you see on the stock are from magic
marker lines that were drawn and then scribed to provide a high
contrast alignment point for the saw.
Cutting aluminum on a crosscut saw isn't hard. Note
the vacuum attached to the saw in the pictures above. Even with it
running during the cuts it took a few days before all of the aluminum
chips were cleaned up.
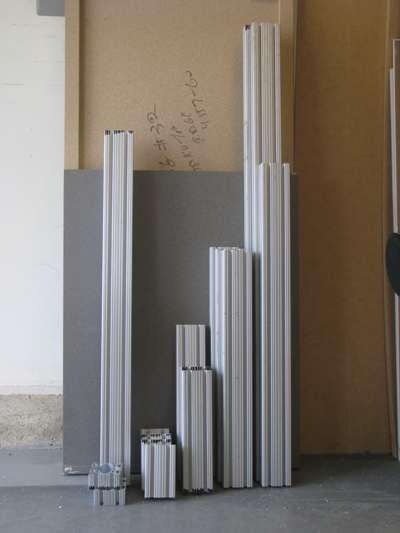
From L to R:
the 3030 gantry crossbar and the two 3030 offset support pieces.
the four 1530 'feet' (5 inches) plus one 1530 stub for a
bearing block support.
the 1530 z-axis and the two 1530 gantry upright supports.
the three 1530 base pieces (24 inch).
the two 1530 base pieces (48 inch) and the 1530 gantry crossbar. |
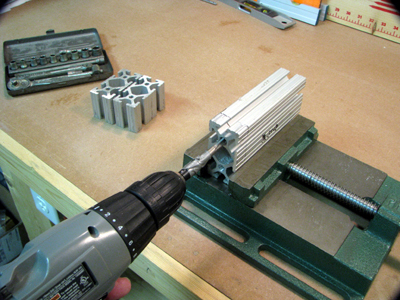
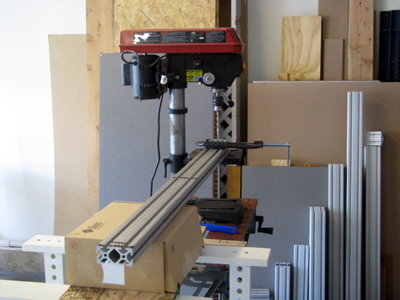
The Drilling
 |
 |
 |
As with the cutting, the longer pieces had
to be supported while being drilled/
To make hole alignment easier, I used one of the 1530 cutoff pieces as
both a
drill and tap guide by enlarging the center holes. |
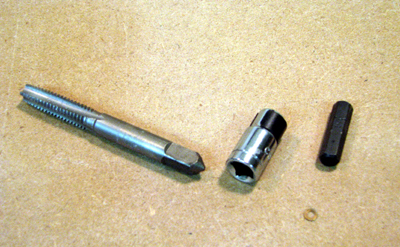
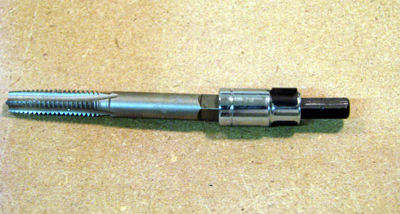
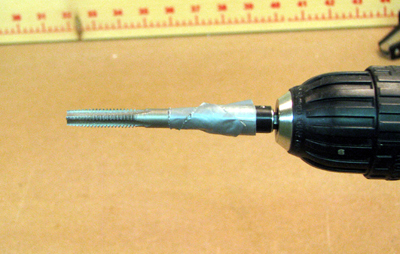
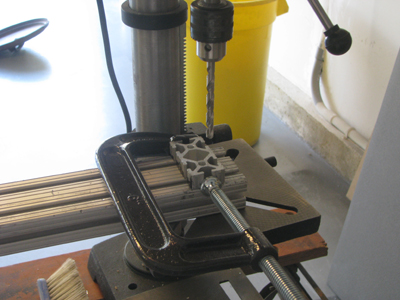
The Tapping
Tapping isn't difficult. I used the drill guide as a tap
block to keep the tap aligned vertically to the hole being tapped.
While not difficult, it is hard work and it takes a toll on the wrist
and shoulder joints. I put together a tap holder that I could use in my
power drill. [Just chucking the tap would not work. I couldn't get the
chuck to get a grip on the tap.]
Gotcha's:
Tapping with a power drill worked here mostly because the
5/6-18 tap is sturdy enough to withstand the stress. A smaller gauge
tap, say 10-32, would just snap off if abused that way. One thing to
watch out for if you do this. Tapping is a series of advance/retreat
cycles where you progressively go deeper into the hole being tapped.
The retreat cycle clears the tap for the next advance. As you advance
the tap till it jams, the drill attempts to rotate. That causes the
drill to rub hard on your thumb where you are holding the hand grip.
Unless you are really careful, you'll get a nice blister.